Author
Suzanne is an Owner/Designer
Author
Suzanne is an Owner/Designer
A gallery wall is the perfect way to inject personality, style, and story into your space. Whether you’re showcasing curated art, family photos, or thrifted finds, a well-thought-out gallery wall can make any room feel elevated. But when is a gallery wall the right choice, and when should you opt for one large statement piece? How do you source art, decide on layouts, and pull everything together cohesively? This guide will help you style a gallery wall like a pro, complete with sourcing tips, layout options, and best practices.
A gallery wall is the perfect way to inject personality, style, and story into your space. Whether you’re showcasing curated art, family photos, or thrifted finds, a well-thought-out gallery wall can make any room feel elevated. But when is a gallery wall the right choice, and when should you opt for one large statement piece? How do you source art, decide on layouts, and pull everything together cohesively? This guide will help you style a gallery wall like a pro, complete with sourcing tips, layout options, and best practices.
Step 1: Plan Your Gallery Wall
Before you start hanging, it’s essential to plan your gallery wall’s style, size, and color palette. This step ensures that the final result feels cohesive and intentional. You need to choose a style, pick the size and scale, and stick to a color pallet:
Choosing the Right Style
The style of gallery wall you choose depends on your space and personality. Here are a few options:
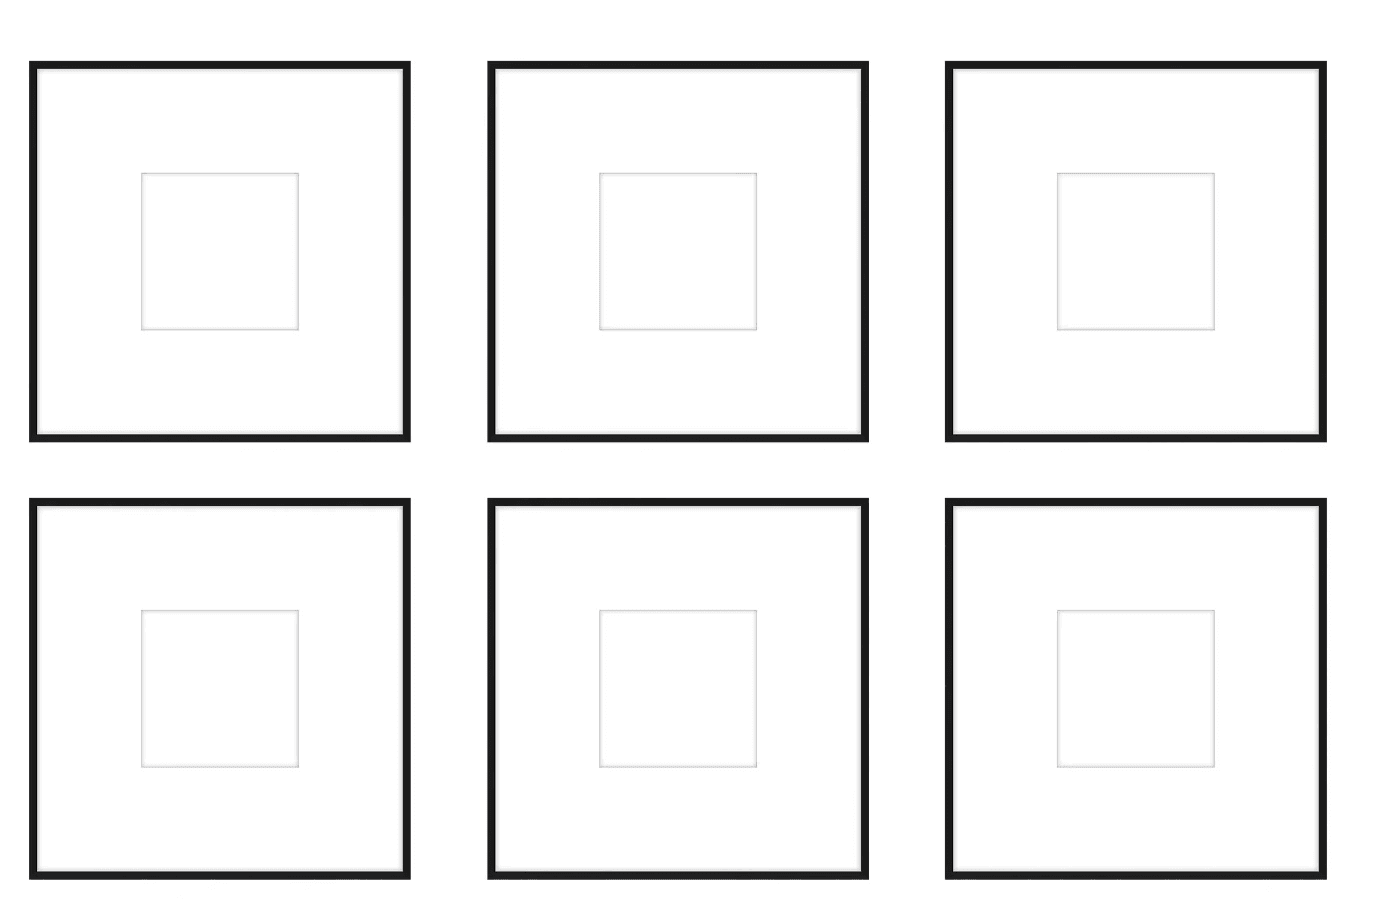
Symmetrical Grid: Clean and formal.
Best for formal spaces like dining rooms and offices.
Frames are the same size and evenly spaced.
Example:
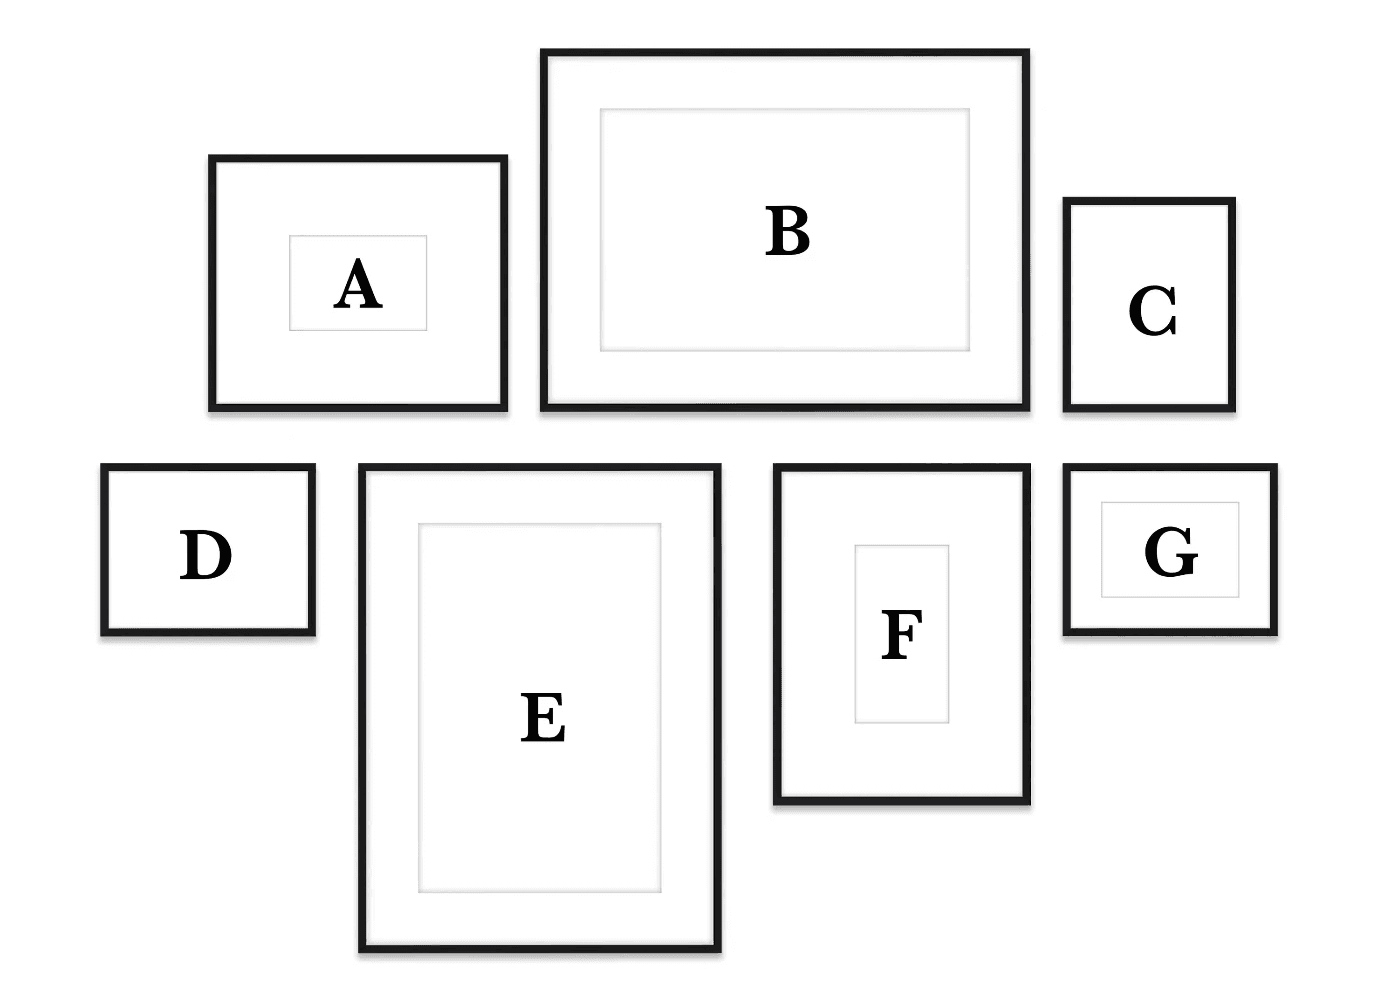
Eclectic Organic: A collected, casual look.
Works well in relaxed spaces — living rooms or hallways
Mix frames, styles, and sizes with a consistent color palette.
Example:
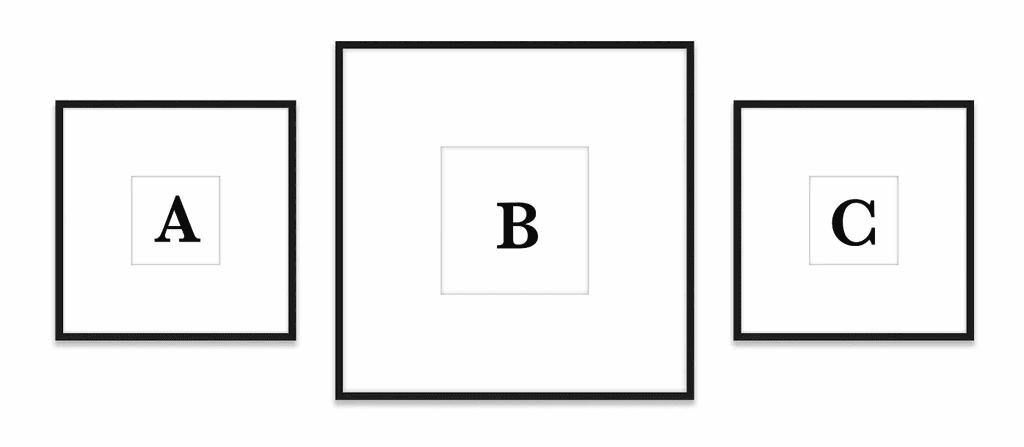
Anchor + Surround: An ode to symmetry.
Perfect for above sofas, beds, or fireplaces.
Use one large central piece as a focal point.
Example:
Linear Shelf Gallery: Art sits on picture ledges.
Art can be evenly spaced or overlapped with varying sizes
Great for ever-changing collections
Example

Floor-to-Ceiling Drama: Expansive gallery walls
Use for stairwells or tall, narrow walls
Creates an impact
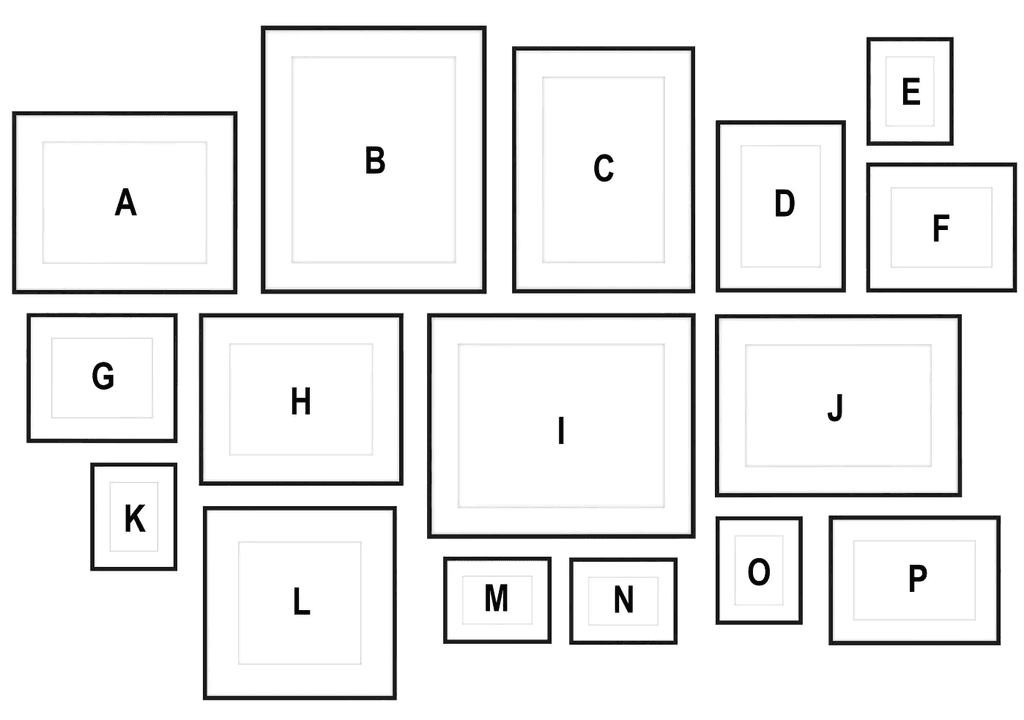
Determine the Size and Scale
A gallery wall should take up 60-75% of the width of the furniture it’s above.
Leave 6-12 inches between the bottom of the frames and the top of furniture.
For a blank wall, center the gallery wall at eye level, approximately 57-60 inches from the floor.
Choose a Color Palette
A cohesive color palette ties everything together.
Stick to 2-3 main colors for the artwork and frames.
Use neutrals like black, white, and beige as a base with a pop of color that matches your room’s decor.
Frame Tip:
Same Frame, Different Sizes: Creates a modern, minimalist look.
Different Frames, Same Color: Adds variety while staying cohesive.
Mixed Frames: Best for eclectic spaces when unified by a theme or color palette.
Step 2: Source Your Artwork
Once you’ve planned your style and palette, it’s time to source your artwork. A mix of prints, photos, and original pieces creates a dynamic, collected look.
Where to Find Art
Etsy: Downloadable prints from shops like 7ArtPrints, Dan Hobday Art, and Nisha Art Gallery.
Affordable Retailers: Stores like Target, West Elm, and Anthropologie offer beautiful, ready-to-frame options.
Chris Loves Julia Favorites: Check out Minted for curated, high-quality art prints.
Emily Henderson Picks: Framebridge offers curated gallery walls, taking the guesswork out of design.
Thrifting Tips for Unique Art
Inspired by A Glass of Bovino, here’s how to thrift like a pro:
Look for High-Quality Frames: Don’t dismiss art with old or dated prints; the frame itself can be reused.
Mix Old and New: Vintage landscapes pair beautifully with modern abstract pieces.
Explore Estate Sales and Flea Markets: Local estate sales and Facebook Marketplace are treasure troves for affordable, one-of-a-kind finds.
Family Photos vs. Collected Art
Family photos are great for personal spaces like a bedroom or up a stairway. Collected art is something to showcase to guests and is great for living areas and foyers. Here are some tips to keep them cohesive:
Family Photos Tip: If all of the photos you would like to display were not taken at the same time, printing them in Black and White keeps them looking cohesive and modern. If you would like them the gallery to feel more whimsical you can thrift frames in 1-2 colors to add some depth while still maintaining consistency with the black and white photos.
Step 3: Lay Out and Measure Your Gallery Wall
Three Layout Methods
Tape the Wall: Use painter’s tape to map out the layout directly on the wall. This method is perfect for visualizing spacing.
Lay it Out on the Floor: Arrange the frames on the floor first, snapping a photo to reference as you hang.
Use Pre-Curated Options: Framebridge offers gallery wall templates that simplify the process.
Spacing Guidelines
Proper spacing ensures the wall feels cohesive:
Keep 2-3 inches between each frame.
For furniture (e.g., sofa, credenza), start the bottom of the gallery wall 6-12 inches above the piece.
When hanging on a blank wall, aim to center the entire gallery wall at eye level (~57-60 inches from the floor).
Low-Hanging Lighting Tip: Be mindful of pendant lights or chandeliers in open spaces. Step back to ensure sightlines feel clear and balanced.
Step 4: Hang Your Gallery Wall
Start with the center or anchor piece, then build outward.
Use a level and painter’s tape to keep everything straight and evenly spaced.
For heavier pieces, use appropriate wall anchors or hooks to keep art secure.
Pro Tip: We love these hangers for easy installation.
Final Thoughts
A gallery wall is one of the most versatile ways to showcase your personality and style. Whether you opt for a curated grid, an eclectic mix, or a dramatic floor-to-ceiling display, planning is key: decide your style, source meaningful art, and measure with intention.
Feeling overwhelmed? Let us help! From art sourcing to flawless installation, we can design a gallery wall tailored to your space.
Ready to bring your walls to life? Reach out today!
Step 1: Plan Your Gallery Wall
Before you start hanging, it’s essential to plan your gallery wall’s style, size, and color palette. This step ensures that the final result feels cohesive and intentional. You need to choose a style, pick the size and scale, and stick to a color pallet:
Choosing the Right Style
The style of gallery wall you choose depends on your space and personality. Here are a few options:
Symmetrical Grid: Clean and formal.
Best for formal spaces like dining rooms and offices.
Frames are the same size and evenly spaced.
Example:

Eclectic Organic: A collected, casual look.
Works well in relaxed spaces — living rooms or hallways
Mix frames, styles, and sizes with a consistent color palette.
Example:

Anchor + Surround: An ode to symmetry.
Perfect for above sofas, beds, or fireplaces.
Use one large central piece as a focal point.
Example:

Linear Shelf Gallery: Art sits on picture ledges.
Art can be evenly spaced or overlapped with varying sizes
Great for ever-changing collections
Example

Floor-to-Ceiling Drama: Expansive gallery walls
Use for stairwells or tall, narrow walls
Creates an impact

Determine the Size and Scale
A gallery wall should take up 60-75% of the width of the furniture it’s above.
Leave 6-12 inches between the bottom of the frames and the top of furniture.
For a blank wall, center the gallery wall at eye level, approximately 57-60 inches from the floor.
Choose a Color Palette
A cohesive color palette ties everything together.
Stick to 2-3 main colors for the artwork and frames.
Use neutrals like black, white, and beige as a base with a pop of color that matches your room’s decor.
Frame Tip:
Same Frame, Different Sizes: Creates a modern, minimalist look.
Different Frames, Same Color: Adds variety while staying cohesive.
Mixed Frames: Best for eclectic spaces when unified by a theme or color palette.
Step 2: Source Your Artwork
Once you’ve planned your style and palette, it’s time to source your artwork. A mix of prints, photos, and original pieces creates a dynamic, collected look.
Where to Find Art
Etsy: Downloadable prints from shops like 7ArtPrints, Dan Hobday Art, and Nisha Art Gallery.
Affordable Retailers: Stores like Target, West Elm, and Anthropologie offer beautiful, ready-to-frame options.
Chris Loves Julia Favorites: Check out Minted for curated, high-quality art prints.
Emily Henderson Picks: Framebridge offers curated gallery walls, taking the guesswork out of design.
Thrifting Tips for Unique Art
Inspired by A Glass of Bovino, here’s how to thrift like a pro:
Look for High-Quality Frames: Don’t dismiss art with old or dated prints; the frame itself can be reused.
Mix Old and New: Vintage landscapes pair beautifully with modern abstract pieces.
Explore Estate Sales and Flea Markets: Local estate sales and Facebook Marketplace are treasure troves for affordable, one-of-a-kind finds.
Family Photos vs. Collected Art
Family photos are great for personal spaces like a bedroom or up a stairway. Collected art is something to showcase to guests and is great for living areas and foyers. Here are some tips to keep them cohesive:
Family Photos Tip: If all of the photos you would like to display were not taken at the same time, printing them in Black and White keeps them looking cohesive and modern. If you would like them the gallery to feel more whimsical you can thrift frames in 1-2 colors to add some depth while still maintaining consistency with the black and white photos.
Step 3: Lay Out and Measure Your Gallery Wall
Three Layout Methods
Tape the Wall: Use painter’s tape to map out the layout directly on the wall. This method is perfect for visualizing spacing.
Lay it Out on the Floor: Arrange the frames on the floor first, snapping a photo to reference as you hang.
Use Pre-Curated Options: Framebridge offers gallery wall templates that simplify the process.
Spacing Guidelines
Proper spacing ensures the wall feels cohesive:
Keep 2-3 inches between each frame.
For furniture (e.g., sofa, credenza), start the bottom of the gallery wall 6-12 inches above the piece.
When hanging on a blank wall, aim to center the entire gallery wall at eye level (~57-60 inches from the floor).
Low-Hanging Lighting Tip: Be mindful of pendant lights or chandeliers in open spaces. Step back to ensure sightlines feel clear and balanced.
Step 4: Hang Your Gallery Wall
Start with the center or anchor piece, then build outward.
Use a level and painter’s tape to keep everything straight and evenly spaced.
For heavier pieces, use appropriate wall anchors or hooks to keep art secure.
Pro Tip: We love these hangers for easy installation.
Final Thoughts
A gallery wall is one of the most versatile ways to showcase your personality and style. Whether you opt for a curated grid, an eclectic mix, or a dramatic floor-to-ceiling display, planning is key: decide your style, source meaningful art, and measure with intention.
Feeling overwhelmed? Let us help! From art sourcing to flawless installation, we can design a gallery wall tailored to your space.
Ready to bring your walls to life? Reach out today!
Step 1: Plan Your Gallery Wall
Before you start hanging, it’s essential to plan your gallery wall’s style, size, and color palette. This step ensures that the final result feels cohesive and intentional. You need to choose a style, pick the size and scale, and stick to a color pallet:
Choosing the Right Style
The style of gallery wall you choose depends on your space and personality. Here are a few options:
Symmetrical Grid: Clean and formal.
Best for formal spaces like dining rooms and offices.
Frames are the same size and evenly spaced.
Example:

Eclectic Organic: A collected, casual look.
Works well in relaxed spaces — living rooms or hallways
Mix frames, styles, and sizes with a consistent color palette.
Example:

Anchor + Surround: An ode to symmetry.
Perfect for above sofas, beds, or fireplaces.
Use one large central piece as a focal point.
Example:

Linear Shelf Gallery: Art sits on picture ledges.
Art can be evenly spaced or overlapped with varying sizes
Great for ever-changing collections
Example

Floor-to-Ceiling Drama: Expansive gallery walls
Use for stairwells or tall, narrow walls
Creates an impact

Determine the Size and Scale
A gallery wall should take up 60-75% of the width of the furniture it’s above.
Leave 6-12 inches between the bottom of the frames and the top of furniture.
For a blank wall, center the gallery wall at eye level, approximately 57-60 inches from the floor.
Choose a Color Palette
A cohesive color palette ties everything together.
Stick to 2-3 main colors for the artwork and frames.
Use neutrals like black, white, and beige as a base with a pop of color that matches your room’s decor.
Frame Tip:
Same Frame, Different Sizes: Creates a modern, minimalist look.
Different Frames, Same Color: Adds variety while staying cohesive.
Mixed Frames: Best for eclectic spaces when unified by a theme or color palette.
Step 2: Source Your Artwork
Once you’ve planned your style and palette, it’s time to source your artwork. A mix of prints, photos, and original pieces creates a dynamic, collected look.
Where to Find Art
Etsy: Downloadable prints from shops like 7ArtPrints, Dan Hobday Art, and Nisha Art Gallery.
Affordable Retailers: Stores like Target, West Elm, and Anthropologie offer beautiful, ready-to-frame options.
Chris Loves Julia Favorites: Check out Minted for curated, high-quality art prints.
Emily Henderson Picks: Framebridge offers curated gallery walls, taking the guesswork out of design.
Thrifting Tips for Unique Art
Inspired by A Glass of Bovino, here’s how to thrift like a pro:
Look for High-Quality Frames: Don’t dismiss art with old or dated prints; the frame itself can be reused.
Mix Old and New: Vintage landscapes pair beautifully with modern abstract pieces.
Explore Estate Sales and Flea Markets: Local estate sales and Facebook Marketplace are treasure troves for affordable, one-of-a-kind finds.
Family Photos vs. Collected Art
Family photos are great for personal spaces like a bedroom or up a stairway. Collected art is something to showcase to guests and is great for living areas and foyers. Here are some tips to keep them cohesive:
Family Photos Tip: If all of the photos you would like to display were not taken at the same time, printing them in Black and White keeps them looking cohesive and modern. If you would like them the gallery to feel more whimsical you can thrift frames in 1-2 colors to add some depth while still maintaining consistency with the black and white photos.
Step 3: Lay Out and Measure Your Gallery Wall
Three Layout Methods
Tape the Wall: Use painter’s tape to map out the layout directly on the wall. This method is perfect for visualizing spacing.
Lay it Out on the Floor: Arrange the frames on the floor first, snapping a photo to reference as you hang.
Use Pre-Curated Options: Framebridge offers gallery wall templates that simplify the process.
Spacing Guidelines
Proper spacing ensures the wall feels cohesive:
Keep 2-3 inches between each frame.
For furniture (e.g., sofa, credenza), start the bottom of the gallery wall 6-12 inches above the piece.
When hanging on a blank wall, aim to center the entire gallery wall at eye level (~57-60 inches from the floor).
Low-Hanging Lighting Tip: Be mindful of pendant lights or chandeliers in open spaces. Step back to ensure sightlines feel clear and balanced.
Step 4: Hang Your Gallery Wall
Start with the center or anchor piece, then build outward.
Use a level and painter’s tape to keep everything straight and evenly spaced.
For heavier pieces, use appropriate wall anchors or hooks to keep art secure.
Pro Tip: We love these hangers for easy installation.
Final Thoughts
A gallery wall is one of the most versatile ways to showcase your personality and style. Whether you opt for a curated grid, an eclectic mix, or a dramatic floor-to-ceiling display, planning is key: decide your style, source meaningful art, and measure with intention.
Feeling overwhelmed? Let us help! From art sourcing to flawless installation, we can design a gallery wall tailored to your space.
Ready to bring your walls to life? Reach out today!
Other Blogs
Other Similar Blogs
Your go-to destination for insightful articles, tips, and inspiration on all things landscaping and outdoor living
Other Blogs
Other Similar Blogs
Your go-to destination for insightful articles, tips, and inspiration on all things landscaping and outdoor living
Other Blogs
Other Similar Blogs
Your go-to destination for insightful articles, tips, and inspiration on all things landscaping and outdoor living
